You can use Sieve filters to move messages into folders, mark them as read, forward it or even move it to the trash can based on one or more rules set it to trigger on. Filters are added via our webmail interface but once enable work even if you don't use mail to read emails on a daily basis, e.g. Outlook or your iPhone are the main methods you use.
Adding Filters
1. Log in to your mailbox via our Webmail service on our website DDNS, on the top bar.
Note: If you have not logged into your webmail before you will be asked to setup an Identity and Signature. You only need to do this once.
2. Click Settings, in the top right corner.
3. Click Filters, middle left of the page.
4. At the bottom of the page, click the + button, in the Filters column. Leave the Filter Sets section as is.
5. Fill out the information in the filter definition section:
Filter Name: identifies the filter from others you create in this set.For incoming mail: Specify what criteria an incoming email has to meet to trigger the action. Click the + button to add more criteria, take note of the three options at the top. Should it match all of the criteria (first option) to trigger the rule or trigger on any. The last option triggers the rule for every email so be very careful with that one. Also take care that your criteria aren't too general or you may find other mail getting sorted as well, you can also use 'does not contain' to exclude specific things.
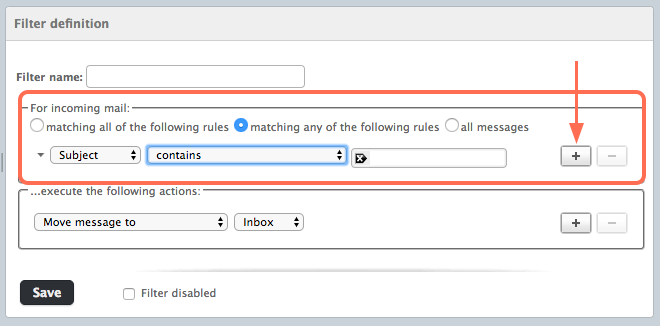
...execute the following actions: This section sets the action that should be executed if the incoming email meets the variables set in the For incoming mail section. Click the + button to add more actions.
6. Click Save
After you have saved the filter, you can repeat steps 4 - 6 to add more filters to the set. Once the filters are saved, they will begin filtering incoming email.