This article explains how to edit your DNS records
1. Log into your account on our website DDNS
2. Select Products / Services on the left-hand side, then click View next to the account you want to work with. Now click the Login To Plesk link from your control panel (orange button).
3. From Websites & Domains click on the domain name you wish to edit. You can expand or contract the menu with the little arrow circled in red.
4. Once you find the desired domain click on Hosting & DNS tab and then select DNS to view / edit records.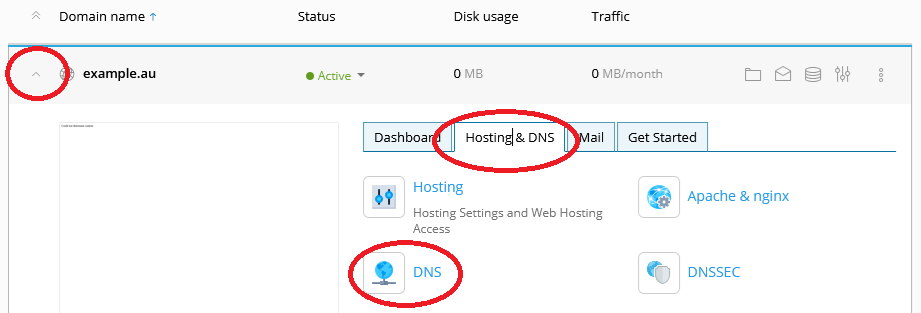
You will now be presented with a list of all your DNS records. You can add, edit and remove any record, but please DO NOT remove the dns1, dns2, dns3 & dns4.quick.net.au NS records as they are required for the zone file to work properly. If you believe you have misconfigured the zone, please see the note on Restore Defaults below, but be sure to make a note of any custom records you have entered before proceeding.
You can click on a record to edit it or use the Add Record button up the top to create new records. When you have finished adding or removing records, click the Update button in the upper right to push your changes to the public DNS servers. It may take up to 15 minutes for the changes you have made to be pushed to the public DNS servers. Once this happens, external DNS servers will start picking up the changes. How quickly this completes will depend on the Time to Live configured in your zone file. Typically this is around 1 hour, but 24 hours is also common.
Restore Defaults - if you wish to return your records (zone file) back to the original ones used for our website and email hosting services, click the Restore Defaults icon up the top. Please note this will wipe any custom records you may have entered, but this is the best way to clean up a messy or misconfigured zone file.